| Learning Aims: |
|
| Materials: |
| A computer with internet connection |
| Suggestions for use: |
|
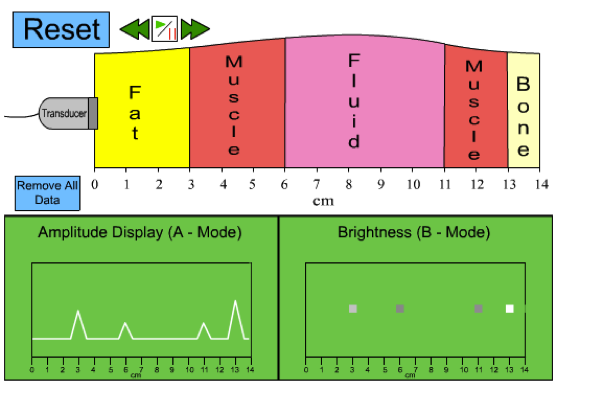
In this activity students learn how an ultrasound B-scan is created. In exploration activity 1 students use the simulation Ultrasound Imaging without Object. (http://physics.doane.edu/hpp/Resources/Media/Flash/UltraSoundImagingwith...).In this simulation a transducer generates an ultrasound pulse, which is transmitted into a patient body built from layers pf fat, muscle, fluid, muscle and bone. The transmitter also records reflected from the “human layers” pulses. Students should first analyse and explain how the ultrasound pulses travel through the body.
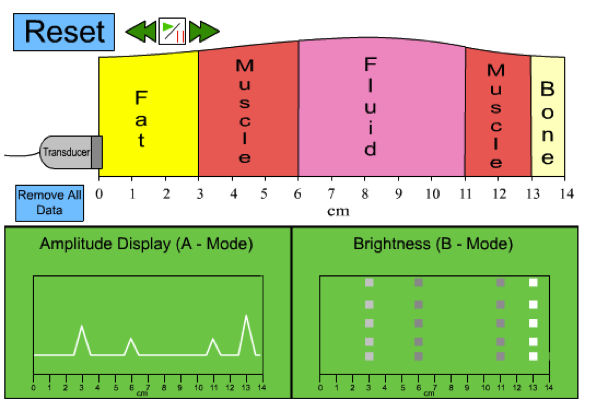
In activity 2 the explanation of a B-scan is given. Students continue to work with the simulation but now they move the transducer to get a complete scan.
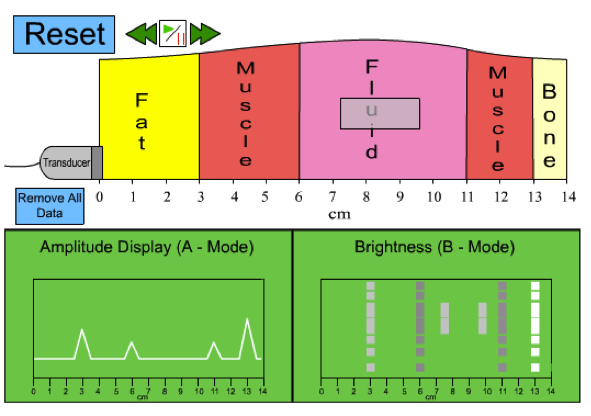
Then by using the simulation Ultrasound Imaging with Object http://physics.doane.edu/hpp/Resources/Media/Flash/UltraSoundImagingwith... students create a new scan. This time there is an extra object inside the body.
Students should explain how they can see on the B-scan that there is an extra object inside the body. In activity 3, an example of the ultrasound B-scan is given. The scan shows a human fetus. Students should be able to distinguish and indicate on the scan the baby head, neck, torso. Both simulations origin from The Humanized Physics Project http://physics.doane.edu/hpp |
| Possible questions: |
|